
I’m going to focus mostly on some design decisions and also how I went about writing an SPI interface using Go on a Raspberry Pi. I assume my readers have a basic understanding of what a Raspberry Pi is, and how basic electronics work. If not, read on anyway and I will be sure to include some valuable resources below.
Why Go? 🔗
In a past life, I worked on hardware interfacing software. The first thing I can certainly tell you is that I hate C. Don’t get me wrong, I understand the appeal of having lightning-fast code. Also, the ability to manipulate memory and low-level functions is useful. I also understand the headache of writing concurrent C code, and anyone familiar with Go knows that this is where it shines.
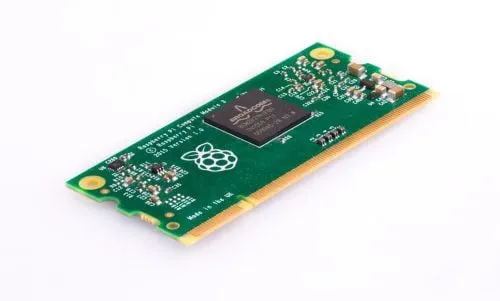
Compute Module 3 Launch Announcement
The project that first got me interested in using Go for embedded applications was one where we decided to use a Raspberry Pi Compute Module 3 to interact with ADC (analog to digital converter) components, and collect data using several of these components.
I quickly threw together a prototype in Python using the standard Python GPIO library, and was satisfied with the initial results. It was apparent however that for a more industrial solution we needed an application that was:
- Faster — Able to support more operations per second at lower memory and CPU usage.
- Compiled — We didn’t want anyone to be able to pop out the Compute Module and steal our source code.
- Maintainable — We had a very small team, and none of us were very experienced with firmware so we wanted to abstract up a bit if possible.
I considered C++ at first. C++ is about as fast as it gets, and is a compiled language. I’m quite comfortable in C++ and have written many applications using it, but we ultimately decided on Go instead for the simple fact the concurrent programming in Go is as easy as it gets. C++ may run a bit faster, but we knew that if we wrote this particular program in Go, it would likely be about half the size (in lines of code) and we were more confident in our ability to keep the code clean and maintainable.
It is important to note that the program in question was doing a lot more than just the data collection via SPI interface with an ADC component. There were user inputs, data displays, etc. It was to be a highly concurrent program.
What is SPI? 🔗
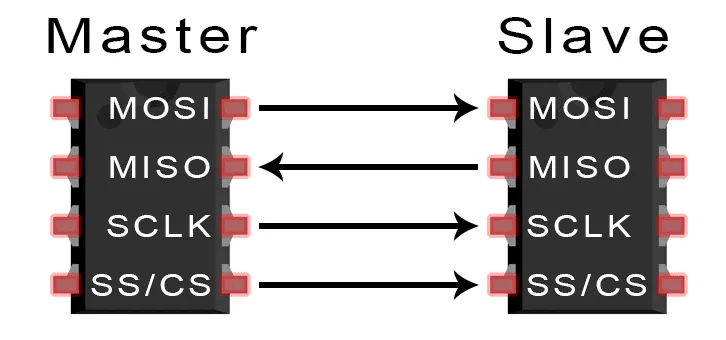
SPI stands for serial peripheral interface. I don’t want to get too far off track, but basically it is just a protocol for a master (your program) to communicate with the hardware (like a thermometer or analog to digital converter). If you want to learn more check out the link in the picture’s caption.
My Environment 🔗
- Device: Raspberry Pi 3B (We used the compute module for production)
- IDE: VS Code
- Remote Editing: Check out this tutorial to edit code on the pi using VS Code remotely
- Hardware: Breadboard, jumper wires, an ADC that uses an SPI interface
- OS: Raspbian
Implementation 🔗
First things first, I needed a great GPIO package. For this project, we built the code to be able to use any of the GPIO pins on the Pi. I used Dave Cheney’s library
The code below should build and run. Please keep in mind that if you are going to use this code, you will need to change the pin numbers to match the pins you used to connect your GPIOs to your ADC.
package main

import (
	"fmt"
	"time"

	"github.com/davecheney/gpio"
)

// AdcRead represents the data needed to perform a read operation on the ADC component
type AdcRead struct {
	Cs          gpio.Pin
	Clock       gpio.Pin
	Miso        gpio.Pin
	NumBits     int
	ResultsChan chan uint32
}

// Exec reads the current value stored in the ADC register
func (reader AdcRead) Exec() {
	// Start the CS Low to begin the read
	reader.Cs.Clear()

	// Initialize an impty uint32 to store the value we are reading
	var result uint32

	// Loop over each bit the the component sends back (The number depends varies from
	// component to component, read the datasheet)
	for i := 0; i < reader.NumBits; i++ {

		// Set the clock to logic high
		reader.Clock.Set()

		// Read 1 bit in, if it is high, then add a "1" to our rightmost bit
		bit := reader.Miso.Get()
		if bit {
			result |= 0x1
		}

		// Shift Left to get to the next bit to be read
		if i != reader.NumBits-1 {
			result <<= 1
		}

		// The clock will pulse low, then high again to get the next bit
		reader.Clock.Clear()
	}

	// Set chip select low to end the read
	reader.Cs.Set()

	// Send the result back through the channel to whatever part of our
	// application cares about it
	reader.ResultsChan <- result
}

func main() {
	// Open necessary pins. The numbers here are examples, they should be changed based
	// on which pins you use
	const csPinNumber = 5
	const clockPinNumber = 6
	const misoPinNumber = 7

	csPin, err := gpio.OpenPin(csPinNumber, gpio.ModeOutput)
	if err != nil {
		fmt.Printf("Error opening cs pin: %v\n", err)
	}
	clockPin, err := gpio.OpenPin(clockPinNumber, gpio.ModeOutput)
	if err != nil {
		fmt.Printf("Error opening clock pin: %v\n", err)
	}
	misoPin, err := gpio.OpenPin(misoPinNumber, gpio.ModeInput)
	if err != nil {
		fmt.Printf("Error opening miso pin: %v\n", err)
	}

	resultsChan := make(chan uint32, 1)

	adcReader := AdcRead{
		Cs:          csPin,
		Clock:       clockPin,
		Miso:        misoPin,
		NumBits:     32, // Our ADC component sends a 32 bit value
		ResultsChan: resultsChan,
	}

	// Execute each read at 10 Hz
	c := time.Tick(time.Duration(100) * time.Millisecond)
	go func() {
		for range c {
			adcReader.Exec()
		}
	}()

	// Print everything that comes through the results channel
	for true {
		result := <-resultsChan
		fmt.Println(result)
	}
}
Take a look at the actual SPI repository: https://github.com/lane-c-wagner/spi